How to create charts with Zapier
It's a common pattern to want to create a chart based on some data you're manipulating in Zapier. Usually after creating the chart, you'll do something like embed it in a document, upload it to a drive, or send it in an email.
This tutorial describes how to create a chart based on data in Zapier, and how to embed the chart in an email.
In this example, we'll use the QuickChart Zapier integration to generate customized charts. As an example data source, we'll use a Typeform survey, but you can use any data source you want in Zapier! Other examples of data sources our users connect include Google Sheets, Airtable, and CRMs like Salesforce.
Zapier has built-in email capabilities that we'll use to embed the chart and send the email whenever new data comes in.
Configure the trigger
In this example, we're using Zapier's Typeform integration as a trigger, but you can use any trigger you want. Alternatives include Google Forms, Google Sheets, Airtable, and SurveyMonkey.
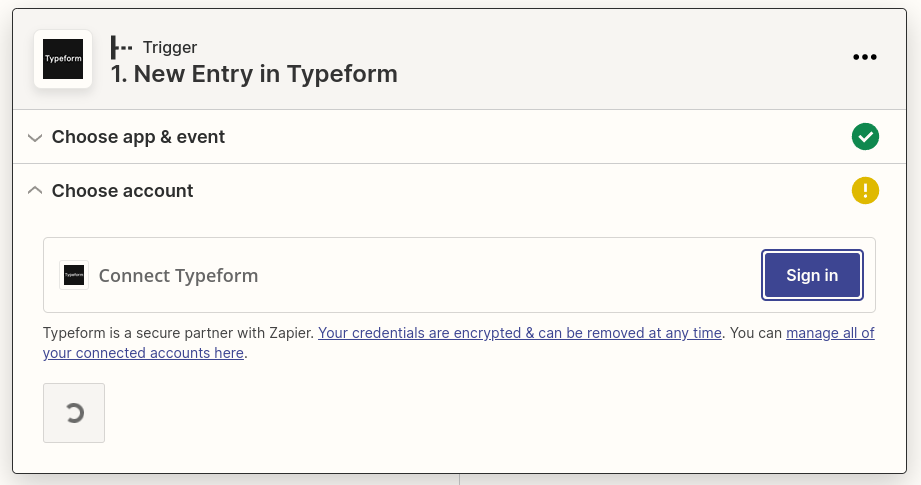
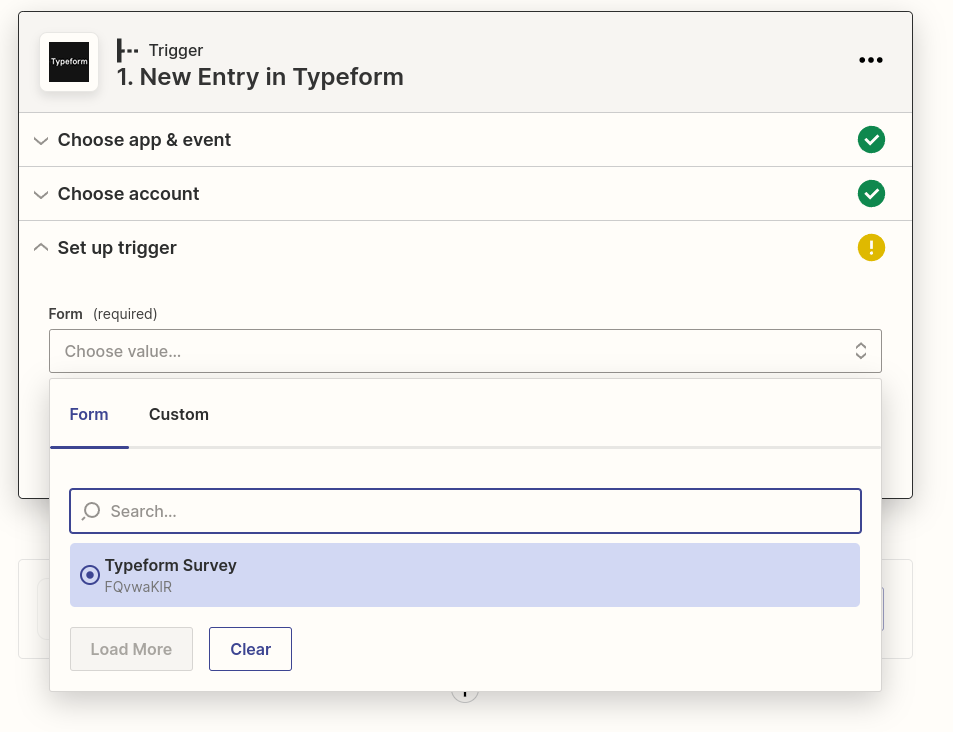
After adding the trigger, you'll be prompted to choose the event and an account. Then, search for the form by name. Modifications to this form will trigger the zap.
Next, find the survey in your Typeform account. You can search by survey name.
Once this is done, press "Continue". You may then test the trigger.
Create the Chart action in Zapier
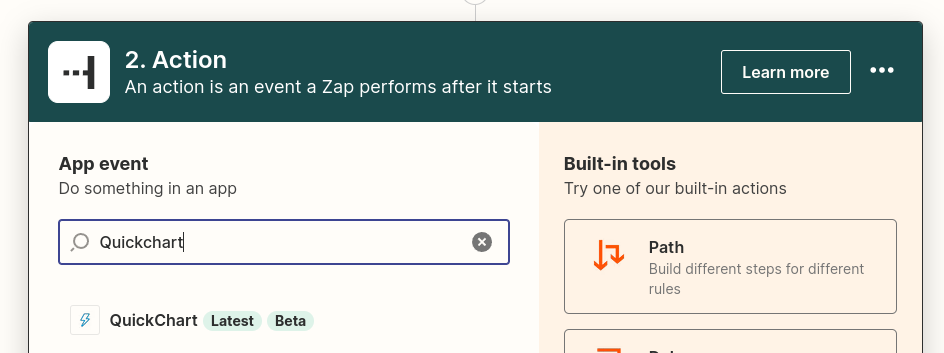
Now you're ready to actually create the chart. We'll do this using the QuickChart action, which generates a chart iimage URL that in Zapier.
Start by searching for "QuickChart" in the actions search.
You'll be prompted for login, but it's not required. If you're asked for an API key or email address, enter your email or leave it blank.
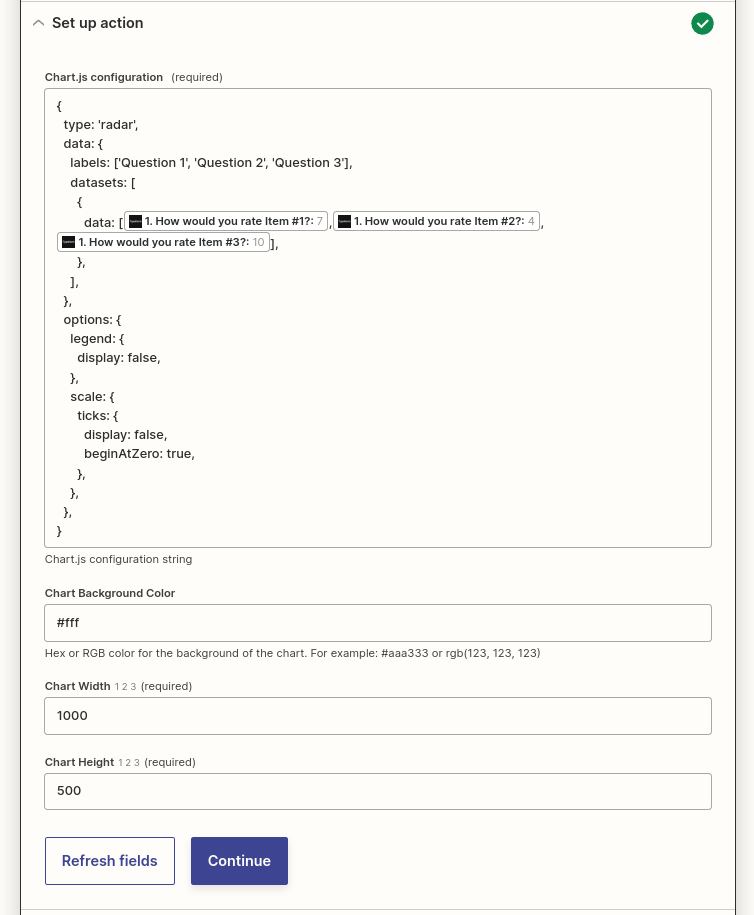
Set up the chart configuration
Now for the most important part: we're going to set up the chart configuration. This Zapier action uses Chart.js, a free and open-source chart specification.
In this example, we're going to create a radar chart. However, other common use cases include bar charts, radial gauges, and polar area charts. There are a wide variety of charts that you can use. See the documentation to learn how to build a chart!
Once you've got your chart configuration, paste it into the action setup on Zapier and substitute the data variables:
Proceed by clicking "Continue" and then running a test.
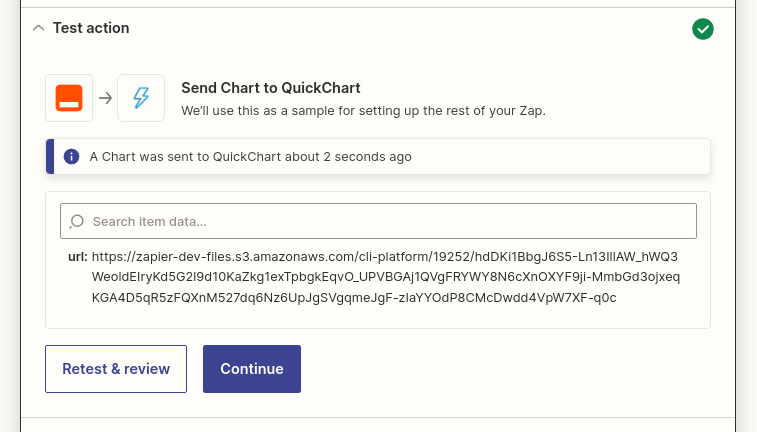
The results should look similar to above. The action outputs a URL. Going to this URL will load a chart image.
As of writing, Zapier deletes images after a few months. If you wish to use the Zapier-generated image for longer, you should consider an additional action that uploads the image to more permanent storage.
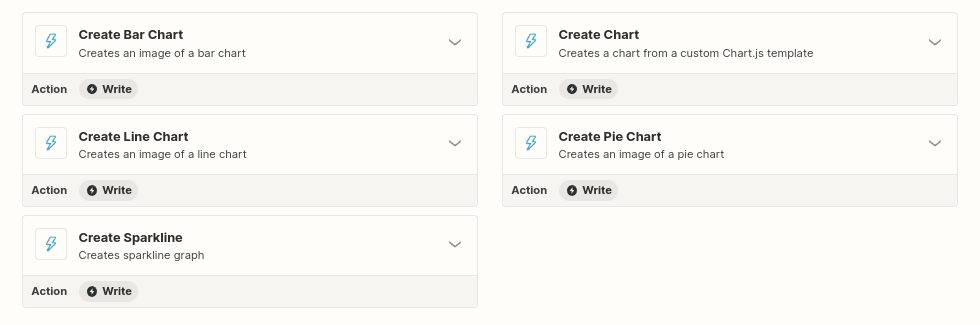
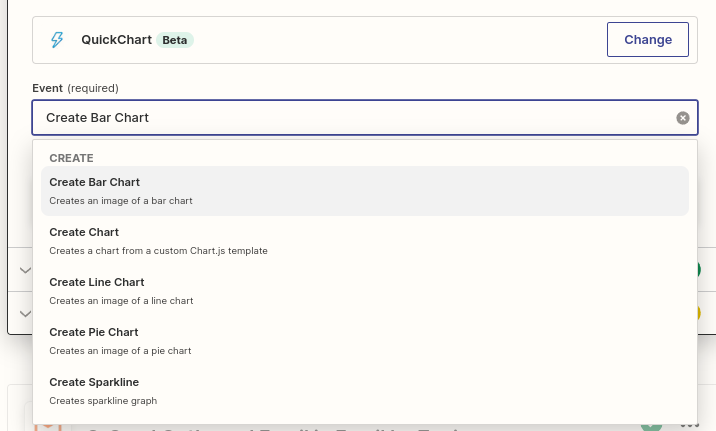
Alternative: Choose a built-in configuration
If you just want a simple chart, there are some built-in chart types that you can use to avoid having to create a JSON configuration. However, if you want the full range of chart customization, you'll have to construct a configuration yourself as described above (it's not so bad!).
Alternative: Use the chart maker
A second way to avoid editing configurations by hand is to use the chart maker, a no-code tool to construct charts.
After obtaining a template URL from the chart maker, you can construct a URL that alters the chart to your liking without having to use the QuickChart action on Zapier.
This approach also works around the fact that Zapier deletes images after a few months, as the chart will be hosted directly on QuickChart.
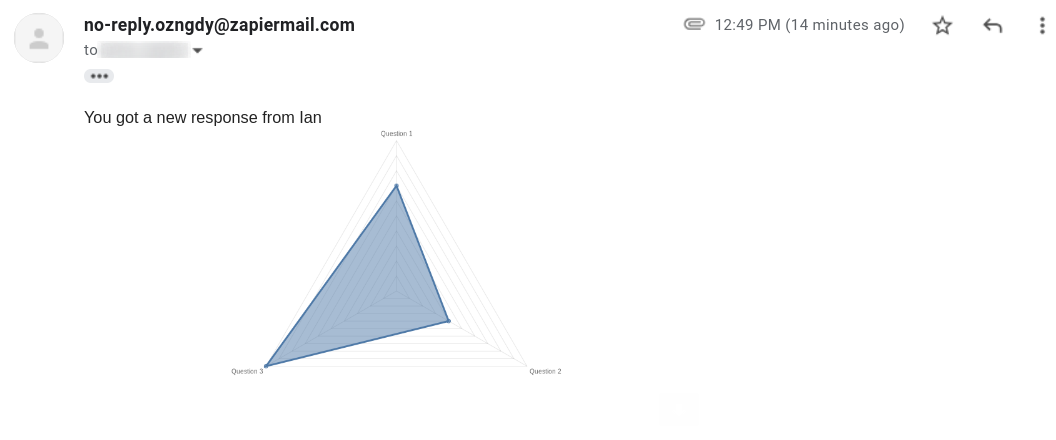
Adding the chart to email
Now that we've generated a chart, it's time to actually do something with it! In this example, we're going to send an email.
Zapier has a built-in "Send Outbound Email" action. Let's search for this action and select it.
In the action setup form, there are two ways to include a chart in the email:
-
To include it as an email attachment, enter the
Chart URLin the Attachment field. -
To embed it in the body of the email, use this HTML:
<div>
  <img width="500" src="Chart URL">
</div>
In this screenshot, the Send Outbound Email action is configured to both attach the chart as well as embed it directly in the email:

Click "Continue" and "Test & Review", and soon you'll have an email in your inbox!
Conclusion
In this article, we learned how to create a chart from data in Zapier. Although we sent this chart in an email, the same technique could just as easily be applied to:
- Adding a chart to a Google Drive or Google Doc
- Sending the chart as a Slack message
- Tweeting the chart
Because the chart is simply a URL, any action that accepts a URL can work with this approach.
Please feel free to reach out with any new ideas or questions! Also, if you need help, check out our community where we discuss QuickChart integrations, chart configurations, and more.
Zapier Quick Access
